
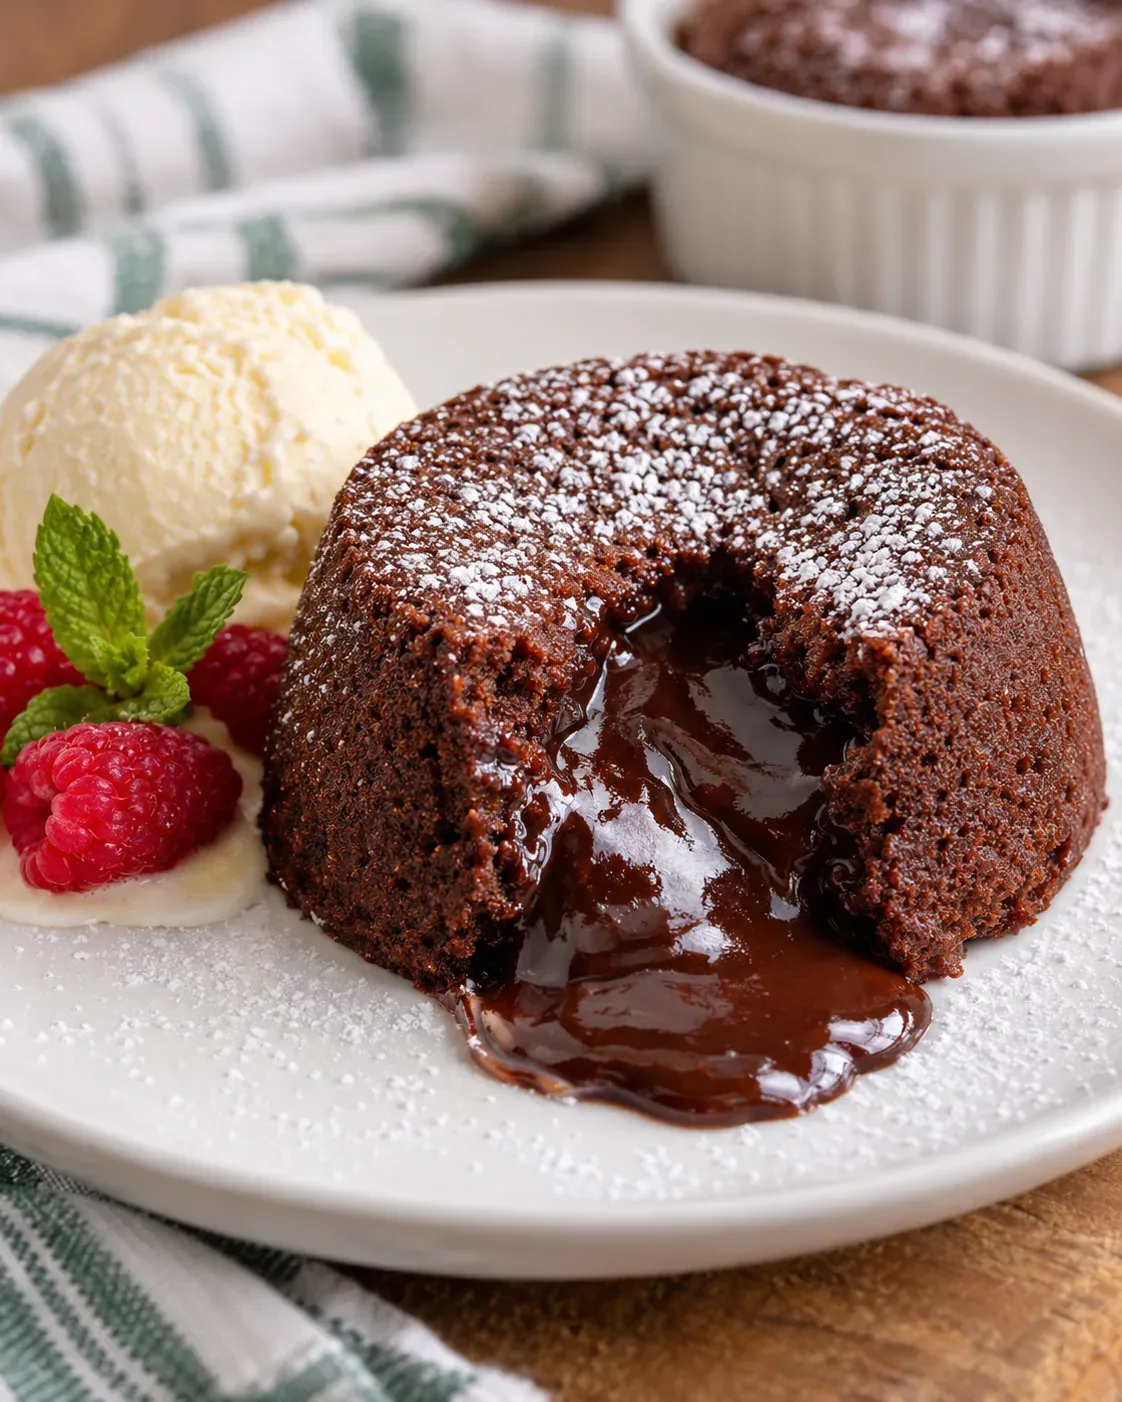
Molten Cake Recipe
Rich individual chocolate cakes with tender edges and a warm, flowing center, made with semisweet chocolate and cocoa powder.
Contains: Milk · Egg · Wheat
Contains milk, egg and wheat. Chocolate and cocoa products can have manufacturer-specific soy, milk or nut statements, so check the labels of the products you use if those allergens are relevant.
WHY IT WORKS
Why This Recipe Works
01
High Heat, Short Bake
A hot oven sets the outside of each cake quickly while the center stays soft and molten.
02
Extra Yolks Add Richness
Whole eggs give the cakes structure while two extra yolks keep the batter rich, smooth and tender.
03
Cocoa-Dusted Ramekins
A thin coating of cocoa powder helps the cakes release cleanly without leaving a pale flour coating on the chocolate exterior.
WHAT YOU’LL NEED
Equipment
THE RECIPE
Ingredients & Method
Use these cooking tools without leaving the recipe. Change the servings, switch measurements, keep a private note in this browser, and use any timer buttons shown below the method steps.
Ingredient quantities have been scaled. Cooking time, oven temperature, pan size and method timings are unchanged.
My Notes
Ingredients
-
Tools
-
-
-
Tools
-
-
-
-
Tools
-
-
-
Method
Tap a step number as you finish it.
Timed steps show a timer button beneath the instruction.
-
Heat the oven to 425°F with a rack in the center. Brush four 6-ounce ramekins with the neutral oil, coat the insides with 1 tablespoon (tbsp) cocoa powder and tap out any excess. Set the ramekins on a rimmed sheet pan.
-
Put the chopped chocolate and butter in a microwave-safe bowl. Microwave in 20-second bursts, stirring after each burst, until smooth. Alternatively, melt them together over a double boiler. Let the mixture cool for about 2 minutes.
-
In a medium bowl, whisk the eggs, egg yolks, granulated sugar, vanilla and salt for about 1 to 2 minutes, until glossy and slightly thickened.
-
Slowly whisk the melted chocolate mixture into the egg mixture until smooth and evenly combined.
-
Sift the remaining 2 tablespoons (tbsp) cocoa powder and the flour over the batter. Fold gently just until no dry streaks remain, then divide the batter evenly among the prepared ramekins.
-
Bake for 9 to 11 minutes, until the edges and tops are set but the centers still look soft and jiggle slightly. Start checking at 9 minutes.
-
Remove the ramekins from the oven and rest for 1 minute. Run a thin knife around each edge, place a dessert plate over the ramekin and invert carefully. Lift off the ramekin and serve immediately, with vanilla ice cream if desired.
COOKING GUIDANCE
Practical Cooking Notes
Doneness
The edges and tops should be set while the centers remain soft and jiggle slightly. Do not wait for the centers to look fully baked or the molten texture will be lost.
Make Ahead
Prepare and fill the ramekins up to 24 hours ahead, cover and refrigerate them. Bake directly from chilled and allow about 1 to 2 extra minutes if needed, using the set-edge and soft-center cues rather than time alone.
Recipe tools
Adapt This Recipe
Change the quantities, measurements, pan, cooking method or ingredients, then turn what you need into a shopping list.
Dietary options
Make This Recipe Work for You
Only straightforward swaps are offered automatically. If changing a defining ingredient would effectively create a different dish, that conversion is left out.
Make It Dairy-Free
Change the following ingredients:
Replace4 ounces (oz) semisweet chocolate, finely chopped
With4 ounces (oz) dairy-free semisweet chocolate, finely chopped
Replace115 grams (g) semisweet chocolate, finely chopped
With115 grams (g) dairy-free semisweet chocolate, finely chopped
Replace1/2 US cup unsalted butter
With1/2 US cup dairy-free baking stick
Replace115 grams (g) unsalted butter
With115 grams (g) dairy-free baking stick
Use dairy-free chocolate and a dairy-free baking stick that are suitable for baking; check product labels because formulations vary.
Make It Gluten-Free
Change the following ingredient:
Replace2 tablespoons (tbsp) all-purpose flour
With2 tablespoons (tbsp) 1-to-1 gluten-free all-purpose flour blend
Replace15 grams (g) plain flour
With15 grams (g) 1-to-1 gluten-free plain flour blend
Use a 1-to-1 gluten-free all-purpose flour blend and check the chocolate and cocoa labels if avoiding gluten strictly.
For allergies, intolerances or strict dietary requirements, check the labels of the specific products you use. These swaps do not certify a recipe or ingredient as allergen-free.
Recipe Notes
Ingredient Notes
Use a semisweet chocolate bar that melts smoothly rather than relying on chocolate chips, which can contain stabilizers that make the mixture thicker. Unsweetened cocoa powder deepens the chocolate flavor and is also used to coat the ramekins.
Useful Substitutions
Bittersweet chocolate can replace the semisweet chocolate in the same quantity for a less-sweet cake. The finished cakes are especially good served warm with vanilla ice cream, whipped cream or fresh berries, but those accompaniments are optional.
INGREDIENT QUALITY
Quality Note
Use a semisweet chocolate bar with a flavor you enjoy on its own. Chocolate chips can contain stabilizers that make the melted mixture thicker, while a bar usually melts more smoothly into the batter.
SPEND LESS
Cost-Saving Tip
Compare chocolate by price per ounce rather than pack price. A larger plain baking bar can be better value than individually portioned premium bars while still giving a smooth molten center.
COOKING TIPS
Tips
Prepare the Ramekins Well
Brush the ramekins thoroughly with oil and coat them with cocoa powder so the cakes release more easily after baking.
Let the Chocolate Cool Briefly
Give the melted chocolate and butter a couple of minutes to cool before whisking them into the eggs so the mixture stays smooth.
Start Checking Early
Ovens and ramekins vary. Begin checking at 9 minutes and remove the cakes when the edges are set but the centers still look soft and jiggle slightly.
Unmold Promptly
Rest the cakes for only about 1 minute before turning them out. A longer rest lets the centers continue setting from residual heat.
MAKE IT LAST
Storing, Freezing & Reheating
Storing
Cool leftover cakes, cover them and refrigerate for up to 2 days. The centers will set as they chill, so the texture will not be as molten as when freshly baked.
Reheating
Reheat an individual cake in the microwave for about 15 to 20 seconds, or warm it in a 300°F oven for about 5 to 7 minutes. Reheating softens the center but does not fully recreate the freshly baked molten texture.
ESTIMATED PER SERVING
Nutrition
1 cake
Nutrition information is an estimate. Where shown, % Daily Value uses standard US Daily Values for adults and children aged 4+; actual values vary with ingredient brands, exact quantities and portion size.
QUESTIONS
Molten Cake FAQs
Is molten cake the same as lava cake?
Yes. Molten chocolate cake and chocolate lava cake are commonly used for the same style of individual chocolate cake with a set exterior and a soft, flowing center.
How do I know when molten cakes are done?
The outer edges should look set and the tops should be puffed, while the centers should still look soft and jiggle slightly when the pan is moved. Start checking at 9 minutes because an extra minute or two can noticeably change the center.
Can I make the batter ahead of time?
Yes. Divide the batter among the prepared ramekins, cover and refrigerate for up to 24 hours. Bake directly from chilled, allowing about 1 to 2 extra minutes if needed and relying on the visual doneness cues.
Can I halve this recipe to make lava cake for 2?
Yes. Halve the ingredient quantities and use two 6-ounce ramekins. Keep the oven temperature the same and begin checking at the same baking time because the size of each individual cake has not changed.
Can I serve molten cake with ice cream?
Yes. Vanilla ice cream is a classic contrast to the warm chocolate center. Add it only after the cake has been turned out so the cake remains the clear focus and the ice cream does not melt before serving.


Looking for Something Else to Cook?
Browse more SinOrSlim recipes or use the recipe tools to adapt what you already have.